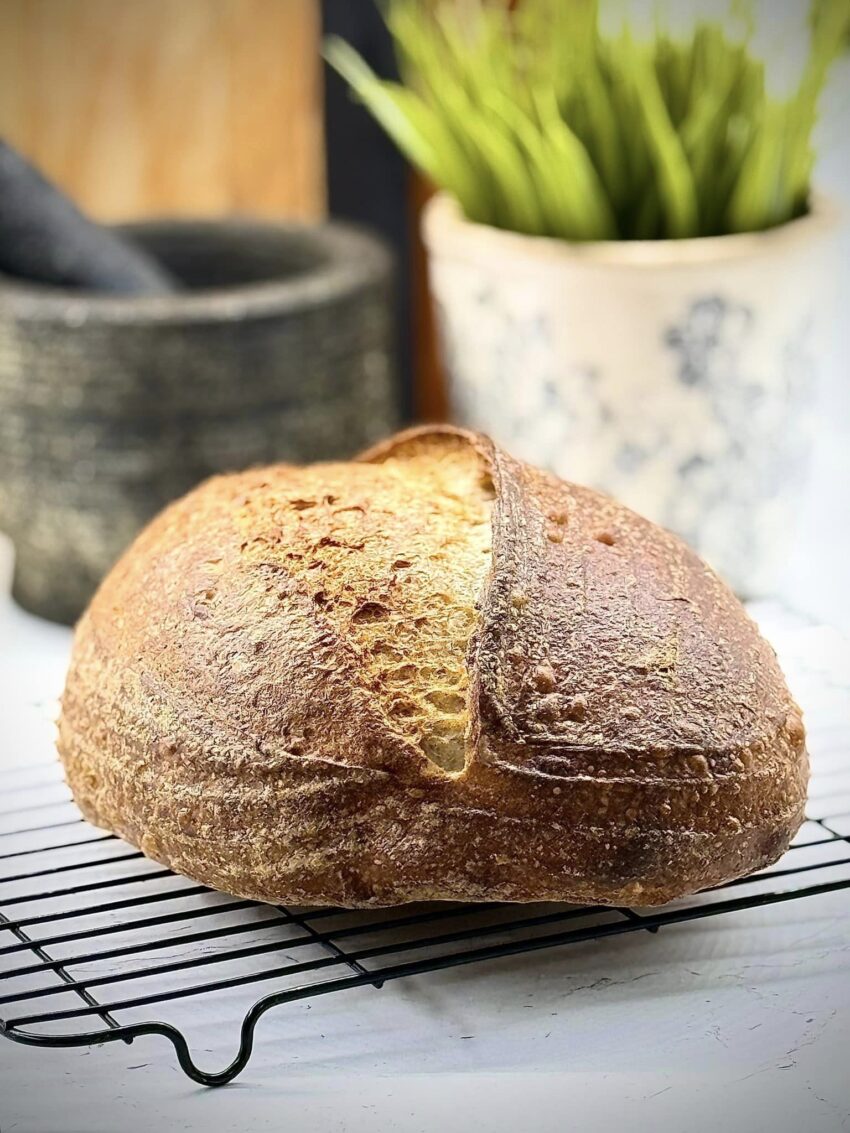
The magic of semolina sourdough bread lies in its deep golden crust and subtly nutty flavor, which is beautifully complemented by the creamy, tender crumb. The semolina flour gives the bread a rich, earthy aroma that fills the kitchen as it bakes, and its slightly coarse texture provides a delightful contrast to the soft interior. Whether enjoyed plain, toasted, or as the base for a hearty sandwich, this bread is a celebration of the ancient art of sourdough baking, offering both complexity and comfort in every bite.
Ingredients:
- For the Levain (Starter):
- 50g active sourdough starter
- 50g all-purpose flour
- 50g semolina flour
- 100g water (room temperature)
- For the Dough:
- 300g semolina flour
- 200g bread flour
- 360g water (room temperature)
- 10g salt
- 150g levain (from above)
- Extra semolina flour for dusting
Instructions:
1. Prepare the Levain:
- In a medium-sized bowl, mix 50g of active sourdough starter, 50g of all-purpose flour, 50g of semolina flour, and 100g of water. Stir until fully combined. Cover the bowl with a kitchen towel or plastic wrap and let it sit at room temperature for 4-6 hours or until it becomes bubbly and doubles in size.
2. Autolyse the Dough:
- In a large mixing bowl, combine 300g of semolina flour, 200g of bread flour, and 360g of water. Mix until no dry flour remains, and the ingredients are fully combined. Cover the bowl and let it rest (autolyse) for 30-45 minutes. This step allows the flour to fully hydrate and begin developing gluten.
3. Mix the Dough:
- After the autolyse period, add 150g of the prepared levain and 10g of salt to the dough. Mix thoroughly using your hands until the levain and salt are evenly incorporated. The dough will be sticky and slightly wet. Transfer the dough onto a clean work surface and perform the stretch and fold method (stretch one side of the dough and fold it over the other side) four times every 30 minutes, covering the dough in between folds. This process helps strengthen the dough.
4. Bulk Fermentation:
- After the final stretch and fold, place the dough in a lightly oiled bowl. Cover it and let it ferment at room temperature for 4-5 hours, or until it has expanded by 50-75%. If your room temperature is warm, this process may take less time; if it’s cooler, it may take longer.
5. Shape the Dough:
- Once the dough has completed bulk fermentation, gently turn it out onto a lightly floured surface. Shape it into a round or oval loaf by folding the edges into the center and then turning it seam-side down. Use your hands to gently tighten the surface of the dough. Place the shaped dough into a proofing basket or bowl lined with a floured towel, seam-side up.
6. Final Proofing:
- Cover the dough and let it proof for 2-3 hours at room temperature, or until it becomes puffy and slightly risen. Alternatively, you can refrigerate it for a slow overnight rise, which will enhance the flavor.
7. Preheat the Oven:
- While the dough is proofing, preheat your oven to 475°F (245°C). If you have a Dutch oven or baking stone, place it in the oven while it preheats.
8. Score and Bake:
- When the dough is ready, carefully turn it out onto a piece of parchment paper. Dust the top with semolina flour and use a sharp knife or razor blade to score the top of the dough with a few slashes (this helps control how the bread expands while baking). Transfer the dough into the preheated Dutch oven or onto the baking stone. Cover with the lid (if using a Dutch oven) and bake for 20 minutes. After 20 minutes, remove the lid and bake for an additional 20-25 minutes or until the crust is deep golden brown and the loaf sounds hollow when tapped on the bottom.
9. Cool the Bread:
- Once baked, remove the bread from the oven and let it cool on a wire rack for at least 1 hour before slicing. This allows the crumb to set properly.
