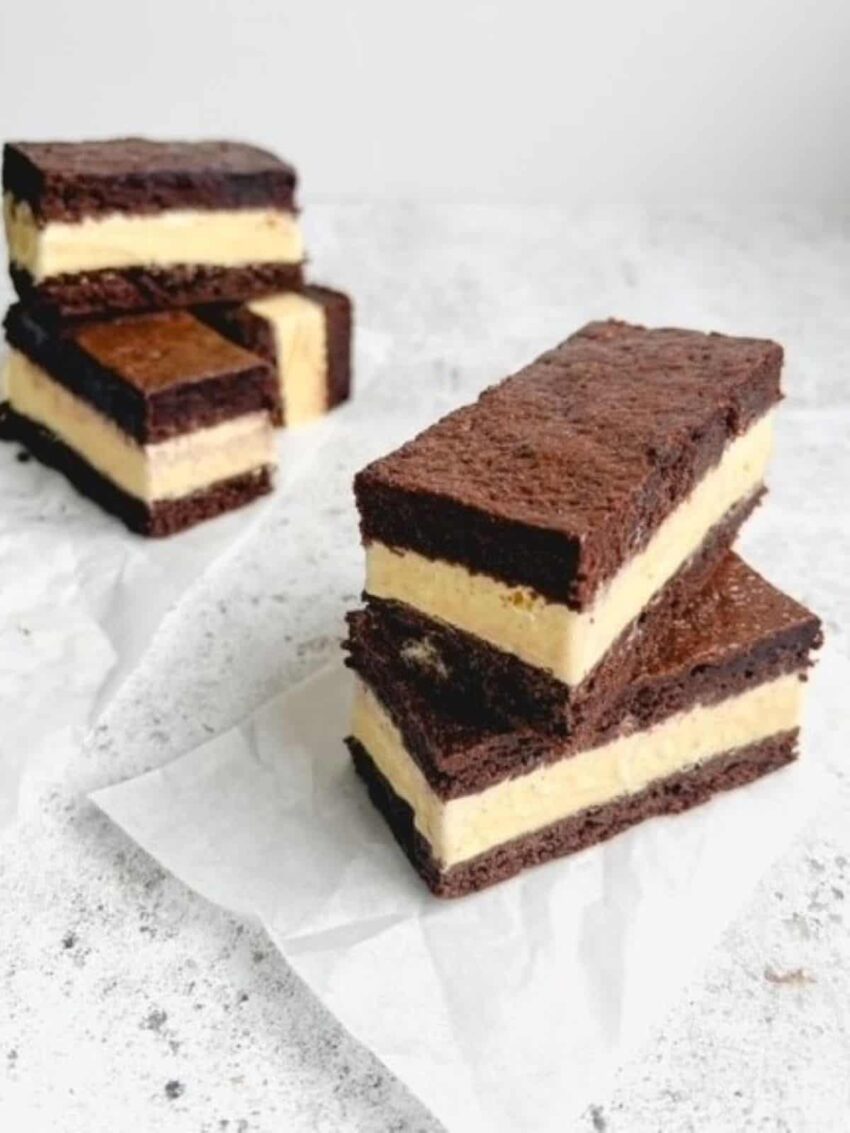
The key to these irresistible gluten-free ice cream sandwiches lies in the balance of textures and flavors: the cookies are perfectly soft with a slight chew, offering a delightful contrast to the creamy, cold ice cream filling. By using a gluten-free flour blend and carefully selecting high-quality ingredients, these sandwiches cater to both dietary needs and taste preferences, making them an inclusive dessert option everyone can enjoy. The process is straightforward, and the result is a homemade treat that captures the nostalgic joy of classic ice cream sandwiches, with the added satisfaction of knowing they’re crafted with love and care.
Ingredients:
For the Cookies:
- 1 1/4 cups gluten-free all-purpose flour blend
- 1/2 cup unsweetened cocoa powder
- 1/2 teaspoon baking soda
- 1/4 teaspoon salt
- 1/2 cup unsalted butter, softened
- 3/4 cup granulated sugar
- 1 large egg
- 1 teaspoon vanilla extract
- 2 tablespoons milk (dairy or non-dairy)
For the Filling:
- 1 quart gluten-free vanilla ice cream (or your favorite flavor)
Instructions:
- Prepare the Dough:
In a medium-sized bowl, whisk together the gluten-free all-purpose flour blend, unsweetened cocoa powder, baking soda, and salt. Set this dry mixture aside. - Mix the Wet Ingredients:
In a large bowl, using an electric mixer, beat the softened butter and granulated sugar together until light and fluffy, about 2 minutes. Add the egg and vanilla extract, and beat until well combined. - Combine Wet and Dry Ingredients:
Gradually add the dry ingredients to the wet ingredients, mixing on low speed until the dough begins to form. Add the milk, one tablespoon at a time, until the dough is moist but not sticky. The dough should hold together well when pressed. - Chill the Dough:
Divide the dough in half and shape each half into a flat disk. Wrap each disk in plastic wrap and refrigerate for at least 30 minutes, or until firm. Chilling the dough helps make it easier to handle and also enhances the flavor of the cookies. - Preheat the Oven:
Preheat your oven to 350°F (175°C). Line two baking sheets with parchment paper. - Roll and Cut the Cookies:
Once chilled, remove the dough from the refrigerator. Place one disk of dough on a lightly floured surface and roll it out to about 1/4-inch thickness. Use a rectangular or round cookie cutter (about 3 inches wide) to cut out shapes. Transfer the cookies to the prepared baking sheets, spacing them about 2 inches apart. Repeat with the second disk of dough. - Bake the Cookies:
Bake the cookies in the preheated oven for 8-10 minutes, or until the edges are set but the centers are still slightly soft. Be careful not to overbake, as gluten-free cookies can become dry. Allow the cookies to cool on the baking sheets for 5 minutes before transferring them to a wire rack to cool completely. - Prepare the Ice Cream Filling:
While the cookies are cooling, let the gluten-free ice cream sit at room temperature for 5-10 minutes, or until it is soft enough to scoop but not melted. Line a baking dish with parchment paper and spread the softened ice cream evenly in the dish to a thickness of about 1 inch. Freeze for 1-2 hours, or until firm. - Assemble the Sandwiches:
Once the cookies are completely cooled and the ice cream is firm, remove the ice cream from the freezer. Use the same cookie cutter you used for the cookies to cut out ice cream shapes. Sandwich the ice cream between two cookies, pressing gently to adhere. Work quickly to prevent the ice cream from melting. - Freeze the Sandwiches:
Wrap each ice cream sandwich individually in plastic wrap and place them in the freezer for at least 1 hour before serving. This will help the sandwiches firm up and hold their shape. - Serve and Enjoy:
Enjoy your gluten-free ice cream sandwiches straight from the freezer for a refreshing, delicious treat. Store any leftovers in an airtight container in the freezer for up to one week.
